
Post-Replacement Roof Inspection and Quality Verification
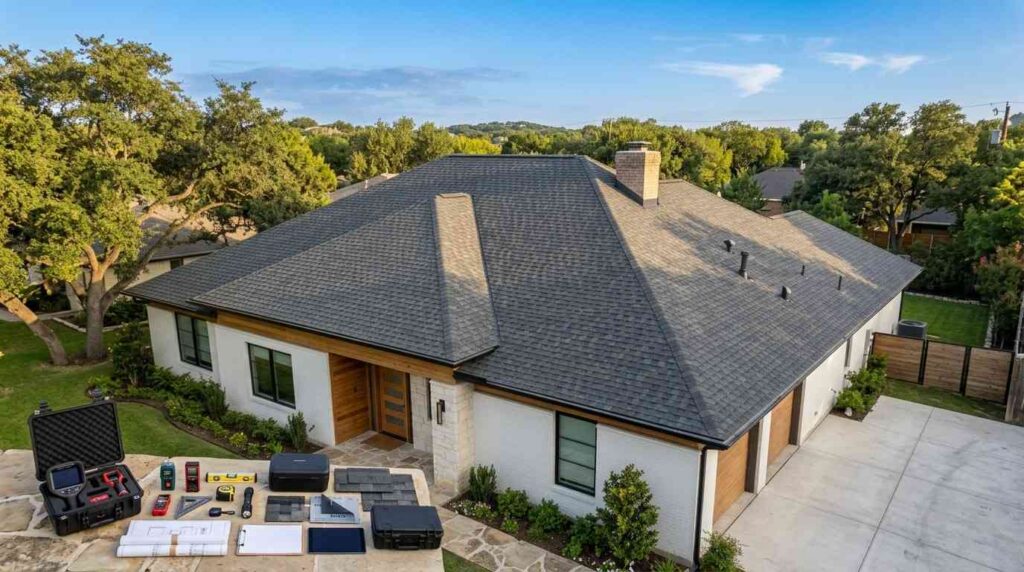
A new roof is a significant investment, and a thorough post-replacement inspection is the only way to confirm the work was done correctly before your contractor leaves the job site. Knowing what to look for, what questions to ask, and what documentation to collect puts you in control of the outcome and protects your investment for years to come.
Most homeowners assume a finished roof is a verified roof. That assumption can lead to missed installation errors, voided warranties, and costly repairs down the road.
This guide walks through every step of a post-replacement roof inspection, from exterior and attic checks to material verification, warranty paperwork, and when to call your contractor back.
What a Post-Replacement Roof Inspection Covers
A post-replacement roof inspection is a structured review of every component of your new roofing system, conducted immediately after installation is complete. It is not a casual walkover. It is a systematic check of workmanship quality, material accuracy, structural integrity, and code compliance. The inspection covers two primary areas: the exterior roofing system and the interior attic space. Both must be evaluated to confirm the installation meets manufacturer specifications and local building standards. A post-replacement inspection is the final quality checkpoint in the roof replacement process — our complete guide to the roof replacement process walks through every phase from tear-off to final sign-off so you know exactly what to expect at each stage.Exterior Inspection Points to Verify
The exterior inspection focuses on everything visible from the roofline down to the gutters. Start at the ridge and work systematically toward the eaves. Key exterior checkpoints include:- Ridge cap installation: Ridge caps should be evenly spaced, properly overlapped, and nailed through both layers. Gaps, lifting edges, or misaligned caps are immediate red flags.
- Drip edge placement: Drip edge should run continuously along all eaves and rakes, seated beneath the underlayment at the eaves and over the underlayment at the rakes.
- Valley flashing: Open or closed valleys must be sealed correctly with no exposed nail heads, gaps in the flashing material, or improper overlap.
- Pipe boot and penetration seals: Every pipe boot, vent stack, and roof penetration should be sealed with a compatible boot collar and no visible gaps between the boot and the pipe.
- Gutter reattachment: Gutters removed during tear-off must be reattached at the correct pitch with no sagging sections or open seams at the fascia.
Interior and Attic Inspection Checks
The attic inspection confirms that the roofing system is performing correctly from the inside out. Many installation problems are visible in the attic before they become visible on the exterior. Check the following inside the attic:- Daylight penetration: No light should be visible through the roof deck. Any pinpoints of light indicate gaps in the underlayment or decking.
- Decking condition: Inspect the underside of the roof deck for soft spots, delamination, or areas where fasteners have missed the rafters.
- Ventilation integrity: Soffit vents, ridge vents, and any baffles should be unobstructed. Insulation should not be blocking airflow at the eaves.
- Moisture or staining: Fresh staining or wet insulation after a rain event following installation indicates a leak point that must be addressed immediately.
- Nail penetration: Roofing nails should penetrate through the decking and be visible in the attic. Nails that have missed the decking entirely, called “shiners,” are a workmanship defect.
How to Verify Workmanship Quality After a Roof Replacement
Workmanship quality is the difference between a roof that performs for 25 years and one that develops problems within the first five. Verifying quality requires knowing the specific installation standards that apply to your roofing material and your local climate. In Austin, TX, roofing installations must account for heat cycling, UV exposure, and the potential for severe hail and wind events. These conditions make proper fastening patterns, correct underlayment installation, and sealed penetrations especially critical. Understanding workmanship standards matters whether you are verifying a new installation or evaluating whether a repair was the right call — our breakdown of roof repair vs. replacement helps homeowners weigh both options against long-term cost and performance.Flashing Installation and Sealing Standards
Flashing is the most failure-prone component of any roofing system, and it is the area where workmanship shortcuts are most likely to appear. Flashing must be installed in the correct sequence, with the correct material, and sealed with a compatible roofing sealant. Verify the following flashing standards:- Step flashing at walls: Each piece of step flashing should be woven between courses of shingles and bent at a 90-degree angle against the wall. No single piece of continuous flashing should substitute for properly stepped individual pieces.
- Counter flashing at chimneys: Counter flashing should be embedded into the mortar joints of the chimney, not simply surface-applied with sealant alone.
- Sealant type and application: Roofing sealant should be a rubberized or polyurethane-based product rated for roofing applications. Standard caulk is not an acceptable substitute.
- No exposed fasteners in flashing: Any nail or screw head visible in a flashing installation without a proper cap or sealant is a workmanship defect.
Shingle Alignment, Fastening, and Coverage
Shingle installation quality is visible from the ground if you know what to look for. Wavy shingle lines, inconsistent exposure, and lifted edges are all signs of installation problems that will shorten the life of your roof. Check these shingle quality indicators:- Exposure consistency: Shingle exposure, the portion of each shingle visible after the next course is laid, should be uniform across every row. Inconsistent exposure indicates improper alignment during installation.
- Fastener placement: Manufacturer specifications require nails to be placed within a defined nailing zone on each shingle. Nails placed too high, called “high nailing,” reduce wind resistance and can void the manufacturer warranty.
- Starter strip installation: A starter strip or starter shingles should be installed along all eaves and rakes before the first course of field shingles. Missing starter strips are a common shortcut that reduces wind uplift resistance.
- Hip and ridge shingles: Hip and ridge cap shingles should be installed with the correct overlap and fastener count specified by the manufacturer.
Roofing Materials and Product Verification
Confirming that the materials installed on your roof match what was specified in your contract is a non-negotiable step in the post-replacement process. Material substitutions, whether intentional or accidental, can affect performance, warranty eligibility, and resale value. Request the following documentation from your contractor before final sign-off:- Product labels and packaging: Ask your contractor to save the shingle packaging or provide the product labels. These confirm the manufacturer, product line, color, and warranty class of the installed shingles.
- Delivery receipts: A delivery receipt from the roofing supplier confirms the quantity and product code of materials delivered to your job site.
- Underlayment and accessory specs: Confirm that the underlayment, ice and water shield, ridge vent, and pipe boots match the specifications listed in your contract.
Confirming Installed Materials Match Your Contract
Compare your signed contract line by line against the documentation your contractor provides. Look specifically for:- Shingle manufacturer and product name: Generic descriptions like “30-year architectural shingle” are not sufficient. Your contract should name the specific product.
- Warranty class: Impact-resistant shingles, Class 4 rated products, carry different warranty terms and insurance benefits than standard shingles. Confirm the correct class was installed.
- Accessory materials: Ice and water shield, synthetic underlayment, and ridge vent products should all be named specifically in your contract and confirmed against delivery documentation.
Warranty Documentation and Final Paperwork
A completed roof replacement comes with two distinct warranties: the manufacturer’s material warranty and the contractor’s workmanship warranty. Both must be documented, registered, and stored before your contractor leaves the job site. Manufacturer warranty registration: Most shingle manufacturers require the homeowner or contractor to register the warranty online within a specified window after installation, typically 30 to 90 days. Failure to register can reduce or void coverage. Confirm with your contractor whether registration is their responsibility or yours. Workmanship warranty terms: Your contractor’s workmanship warranty covers installation errors and defects in labor. Review the warranty document carefully for the coverage period, what is excluded, and the process for filing a claim. Permit and inspection documentation: In Austin, TX, most roof replacements require a building permit and a final inspection by the city. Request a copy of the permit and the signed inspection record from your contractor. These documents confirm code compliance and may be required for insurance claims or home resale. Collecting the right paperwork after your roof is finished is the only way to protect your investment long-term — our detailed overview of the roof replacement warranty explains what manufacturer and workmanship warranties cover, how long they last, and what voids them.When to Call Your Contractor Back for Corrections
Not every post-replacement issue requires a full callback, but some defects must be corrected before you consider the project complete. Knowing the difference protects your warranty and your relationship with your contractor. Call your contractor back immediately for:- Any visible daylight through the roof deck in the attic
- Lifted, misaligned, or missing shingles after installation
- Flashing that is surface-applied with sealant only at chimney or wall transitions
- Pipe boots that are not seated flush against the roof surface
- Missing drip edge at any eave or rake
- Permit inspection that was not completed or failed