Blog
Shingle Repair Techniques for Cracked, Curled, and Missing Shingles
Published 2026-07-05T00:00:00+00:00
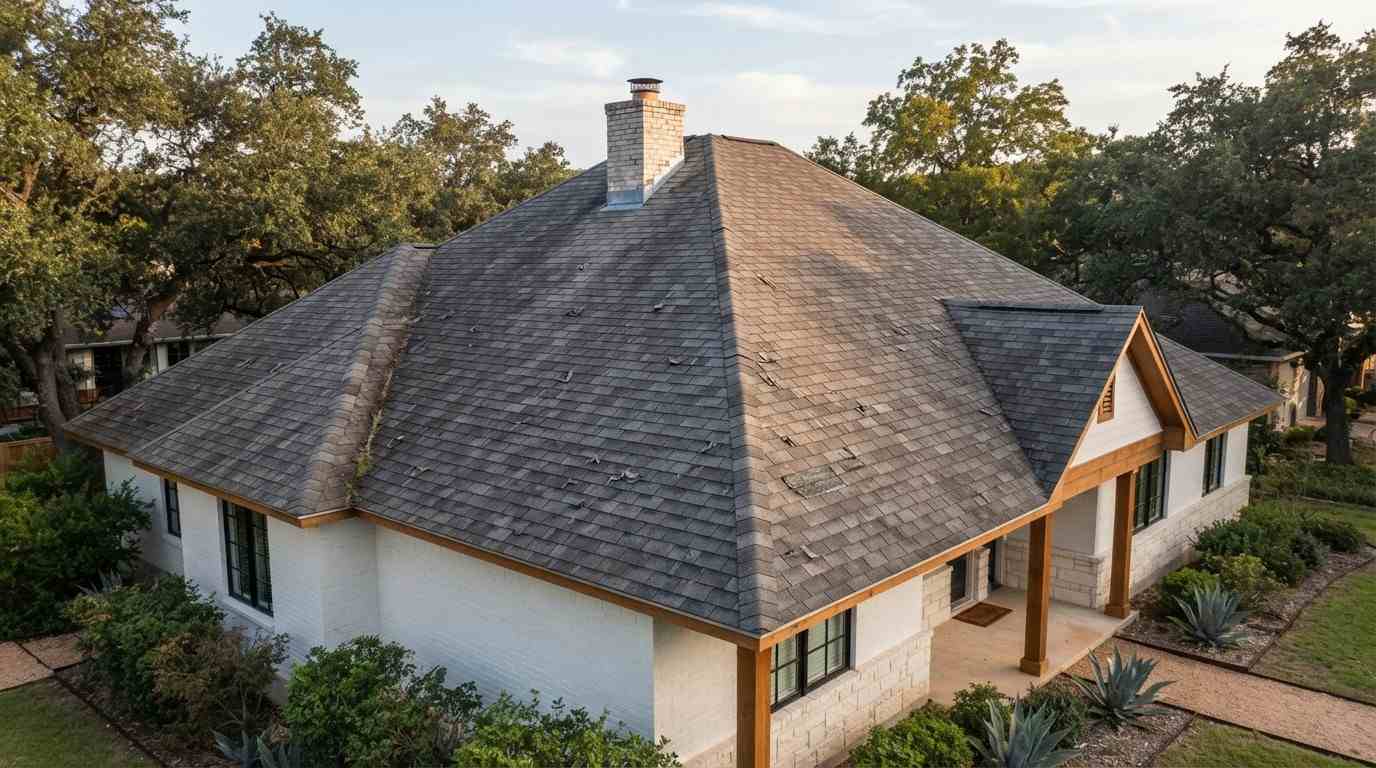
Cracked, curled, and missing shingles are among the most common roofing problems Austin homeowners face and catching them early can mean the difference between a simple repair and a costly replacement. Each damage type requires a different repair approach, and using the wrong technique can accelerate deterioration rather…
Cracked, curled, and missing shingles are among the most common roofing problems Austin homeowners face and catching them early can mean the difference between a simple repair and a costly replacement. Each damage type requires a different repair approach, and using the wrong technique can accelerate deterioration rather than stop it. This guide covers the practical repair methods for all three shingle conditions, the tools you need, and the cost factors specific to Austin, TX.
Ignoring damaged shingles allows water infiltration, deck rot, and interior damage to develop quickly, especially during Austin's storm season.
This guide walks through identification, step-by-step repair methods, cost expectations, and the key signs that repair is no longer the right answer. How to Identify the Type of Shingle Damage Before You Repair Accurate diagnosis is the foundation of effective shingle repair. Applying the wrong fix to the wrong damage type wastes time, money, and materials and can void manufacturer warranties if improper products are used.
Understanding what type of damage you are dealing with is the first step in any repair our roof inspection process guide explains what a professional inspector looks for and how to document damage before scheduling repairs. Signs of Cracked Shingles Cracked shingles typically result from thermal cycling the repeated expansion and contraction caused by Austin's temperature swings between hot summers and cooler winters. Cracks appear as hairline fractures or splits running across the shingle surface, often concentrated near the center or edges. You may also notice small fragments of shingle material in your gutters or on the ground below the roofline. Signs of Curled or Cupped Shingles Curling takes two forms: cupping, where the edges turn upward, and clawing, where the middle lifts while the edges stay flat. Both indicate moisture imbalance, poor attic ventilation, or shingles that have reached the end of their service life. Curled shingles are highly vulnerable to wind uplift and are a leading cause of water intrusion along the shingle edges. Signs of Missing Shingles Missing shingles leave the roof deck directly exposed to rain, UV radiation, and debris. They are most commonly caused by high winds, improper nailing during installation, or shingles that have become so brittle with age that they detach under normal weather stress. Exposed decking that appears darker or discolored often indicates that water has already begun to penetrate. How to Repair Cracked Shingles Minor cracks those that do not extend through the full thickness of the shingle can be sealed effectively without replacing the shingle entirely. This is one of the most cost-efficient repairs available to homeowners when the damage is caught early. Tools and Materials You Need Roofing sealant or asphalt roof cement Caulking gun Putty knife or trowel Roofing granules (matched to shingle color) Stiff-bristle brush Safety harness and non-slip footwear Selecting the right sealant matters a product that is not rated for asphalt shingles or that lacks UV resistance will degrade quickly under Austin's sun exposure. If you need guidance on product selection, a dedicated resource on best roofing sealants for shingle repair covers the top-rated options by damage type and climate. Step-by-Step Crack Repair Process Clean the cracked area with a stiff brush to remove dirt, debris, and loose granules. Apply a bead of roofing sealant directly into the crack using a caulking gun, pressing it firmly into the gap. Smooth the sealant with a putty knife so it sits flush with the shingle surface. Immediately press matching roofing granules into the wet sealant to protect it from UV degradation and to blend the repair visually. Allow the sealant to cure fully before exposing the area to rain check the product label for cure time, which typically ranges from 24 to 48 hours. For cracks that run the full length of the shingle or that have caused the shingle to split into separate pieces, full shingle replacement is the more reliable solution. How to Fix Curled Shingles Curled shingles that are still structurally intact meaning they have not cracked, lost significant granule coverage, or become brittle can often be reattached without full replacement. Reattaching Curled Edges with Roofing Adhesive On a warm day (above 50°F), gently press the curled section flat. Attempting this in cold weather increases the risk of cracking the shingle. Apply a small amount of roofing adhesive or roofing cement under the lifted edge using a caulking gun. Press the shingle firmly down and hold it in place for 30 to 45 seconds. Apply a small weight such as a brick over the repaired area and leave it for 24 hours to allow the adhesive to bond fully. Inspect the surrounding shingles for similar lifting, as curling in one area often indicates a systemic ventilation or moisture issue. When Curling Signals a Bigger Problem Curling that affects a large portion of the roof particularly if it is widespread across multiple slopes is rarely a repair problem. It is a replacement signal. Widespread curling indicates that the shingles have reached the end of their functional lifespan, that the attic ventilation system is inadequate, or that moisture has compromised the shingle substrate.
When curling affects more than 20 to 30% of your shingles, repair alone may not be the right solution our guide to roof replacement options walks through the full decision framework, cost comparisons, and what to expect during a full reroof in Austin. How to Replace Missing Shingles Missing shingles require prompt replacement. Every day a section of roof deck is exposed increases the risk of water infiltration, mold growth, and structural damage to the decking and rafters below. Matching Replacement Shingles to Your Existing Roof Finding a shingle that matches your existing roof in color, texture, and profile is critical for both aesthetic and functional reasons. Mismatched shingles can create gaps in the overlap pattern that allow water to penetrate. Bring a sample of your existing shingle or a photo showing the manufacturer's label to your roofing supplier. If your roof is more than 10 years old, an exact match may not be available, and a close visual match is the practical alternative.
For a detailed walkthrough of the matching process by shingle type and manufacturer, a dedicated guide on how to match replacement shingles covers the full selection process. Step-by-Step Missing Shingle Replacement Slide a pry bar under the damaged or missing shingle's neighboring shingles to expose the nails holding the old shingle in place. Remove the nails using the pry bar and slide out any remaining shingle fragments. Slide the new shingle into position, aligning it with the existing shingle rows on both sides. Nail the new shingle in place using four roofing nails positioned approximately one inch from each edge, just below the adhesive strip. Press down the overlapping shingles from the row above to reseal the adhesive strip over the new shingle's nail line. Apply a small bead of roofing sealant over each nail head to prevent water infiltration at the fastener points. When Shingle Repair Is Not Enough Knowing When to Replace Shingle repair is the right choice when damage is isolated, the surrounding shingles are in good condition, and the roof is within the first two-thirds of its expected service life. When those conditions are not met, repair becomes a temporary and increasingly expensive solution.
Key indicators that replacement is the better investment include: shingles that are 20 or more years old, damage affecting more than 30% of the roof surface, recurring leaks in the same area despite previous repairs, visible sagging or soft spots in the decking, and granule loss so significant that the underlying mat is exposed across multiple sections.
Knowing when to stop patching and start planning a full replacement is one of the most important decisions a homeowner can make our breakdown of repair vs. replacement costs covers the key thresholds, cost comparisons, and long-term value factors that guide that decision. Shingle Repair Costs in Austin, TX Shingle repair costs in Austin vary based on the type of damage, the number of shingles affected, roof pitch and accessibility, and the materials required. For minor crack sealing on a small number of shingles, homeowners typically pay between $150 and $400. Replacing individual missing shingles generally runs between $200 and $600 depending on shingle type and labor time. More extensive repairs involving multiple damaged sections can range from $600 to $1,500 or more.
Labor rates, material prices, and roof accessibility all affect what you will pay for shingle repairs in Austin our complete guide to roofing cost factors breaks down every pricing variable so you can budget accurately before calling a contractor.
If your shingles were damaged by hail or high winds, the repair process and cost structure can differ significantly from standard wear our resource on storm damage repairs covers insurance claims, documentation, and what Austin homeowners should expect after a severe weather event.
Austin's climate characterized by intense UV exposure, summer heat, periodic hail, and high winds accelerates shingle wear faster than in many other regions. Budgeting for periodic shingle maintenance every three to five years is a practical strategy for extending roof life and avoiding larger repair bills. Conclusion Cracked, curled, and missing shingles each require a specific repair approach and matching the technique to the damage type is what determines whether a repair holds or fails prematurely. Early identification and prompt action protect the roof deck, the structure below, and the long-term value of the home.
Austin's climate puts consistent stress on asphalt shingles, making routine inspection and timely repair a practical investment rather than an optional one. Understanding the limits of repair and recognizing when replacement is the smarter path saves homeowners from compounding costs over time.
At Tarrytown Roofing , we help Austin homeowners assess shingle damage accurately, choose the right repair approach, and make confident decisions about their roofs. Contact us to schedule an inspection and get a clear, honest assessment of what your roof needs. Frequently Asked Questions Can I repair cracked shingles myself, or do I need a professional? Minor hairline cracks can be sealed by a careful homeowner using roofing sealant and matching granules. However, cracks that run the full length of a shingle, or damage on steep or high roofs, are safer and more reliably handled by a licensed roofing contractor. How long does a shingle repair typically last? A properly executed shingle repair using quality roofing sealant or cement can last five to ten years on shingles that are otherwise in good condition. Repairs on aging or heavily weathered shingles tend to have shorter effective lifespans. What causes shingles to curl, and can it be prevented? Curling is most commonly caused by inadequate attic ventilation, moisture imbalance between the top and bottom of the shingle, or shingles that have simply aged past their service life. Improving attic ventilation and scheduling regular roof inspections can slow the progression of curling. How many missing shingles require a full roof replacement? There is no fixed number, but if missing shingles are spread across multiple areas of the roof, if the underlying decking shows water damage, or if the roof is more than 20 years old, replacement is typically the more cost-effective long-term solution than repeated patching. Does homeowners insurance cover shingle repair in Austin? Insurance coverage for shingle repair depends on the cause of damage. Storm-related damage including hail and wind is typically covered under standard homeowners policies. Damage from normal wear and aging is generally not covered. Documenting damage promptly after a storm and filing a claim quickly improves the likelihood of approval. How do I know if my shingles have hail damage? Hail damage on asphalt shingles typically appears as dark, circular impact marks where granules have been knocked away, leaving the underlying mat exposed. The impacts often feel soft or spongy when pressed. A professional inspection is the most reliable way to assess hail damage accurately before filing an insurance claim. How often should Austin homeowners inspect their shingles? Inspecting your roof at least twice a year once in spring and once in fall is a practical baseline for Austin homeowners. Additional inspections after major hail events or high-wind storms are strongly recommended to catch damage before it leads to leaks or structural issues.
Related

Blog
Underlayment Systems for New Roof Installations
Underlayment Systems for New Roof Installations Roofing underlayment is the protective layer installed directly on your roof deck beneath the shingles and choosing the right system is one of the most important decisions in any new roof installation. Most homeowners focus on shingle color or material, but underlayment is what stands between your home and…
Blog
Warranty Coverage for Roof Replacement Materials and Labor
Warranty Coverage for Roof Replacement Materials and Labor Most roof replacement warranties split into two separate coverages: one from the manufacturer protecting the materials, and one from your contractor protecting the installation work. Knowing what each covers, how long each lasts, and what can void them is essential before you sign any roofing contract. When…
Blog
Signs That a Roof Needs Full Replacement Rather Than Repair
Signs That a Roof Needs Full Replacement Rather Than Repair Not every roofing problem can be fixed with a patch. When damage is widespread, structural, or tied to a roof that has simply reached the end of its service life, repairs become a short-term solution to a long-term problem and the costs add up fast….
Ready for the next step?
Free inspection, real answers, no pressure.